我们以创建iphone12为例子
iphone 12
我们以创建iphone12为例子
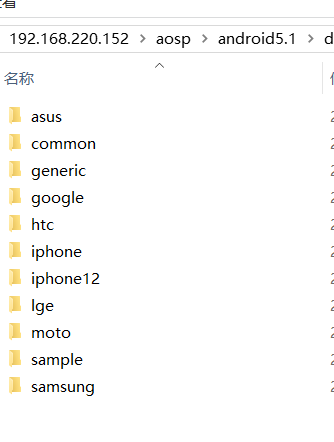
首先,我们复制一份device/iphone作为device/iphone12

然后呢?修改我们的编译项,vendorsetup.sh,修改相关的设备名,品牌名之类的。
add_lunch_combo iphone12-userdebug
不过同学们要注意了:
- iphone12-userdebug这个iphone12的名字要和AndroidProducts.mk里的iphone12.mk对应,也就是我们要把iphone.mk改成iphone12.mk
- PRODUCT_NAME := iphone12也被我修改了
- PRODUCT_DEVICE := iphone12_x86这个要跟device/apple/iphone12_x86这个文件夹的名字匹配
- PRODUCT_BRAND := apple
- PRODUCT_MODEL := AOSP iPhone12 on x86 Emulator
以上内容,修改相关的配置
接下来我们先修改一个文件目录结构,把常修改的东西独立出来,比如说跟产品配置有关的,我们在iphone12下创建一个custom的文件夹,里面创建一个ProdutConfig.mk文件。

在哪里引入呢?
我们可以iphone12.mk里引入
$(call inherit-product, device/iphone/custom/ProductConfig.mk)
接着,我们是不是可以把我们需要编译哪些软件,哪些库,使用什么样的开机动画,产品名称,版本号之类的这些东西都在ProductConfig.mk里进行配置了呀。
开机动画
创建了iphone12产品,我们先从开机动画开始做起吧。
开机动画在哪里配置的呢?格式又是怎么样子的呢?
在这个路径上给大家提供了一些动画的案例
开始
我们是新手,我们如何知道android的开机动画在哪里呢?由前面的信息,我们知道这个动画是bootanimation.zip
我们尝试搜索一下这个文件,看看它在哪里。
aosp@ubuntu:~/android5.1$ find ./ -name "bootanimation.zip"
./device/asus/fugu/bootanimation.zip
aosp@ubuntu:~/android5.1$ find ./ -name "*.mk" | xargs grep "bootanimation.zip"
./device/asus/fugu/device.mk:    device/asus/fugu/bootanimation.zip:system/media/bootanimation.zip
这是我从源码里找到的跟开机动画有关的文件和代码
从这里可以看出,它是要放置到system/media目录下的。这个我们知道以后,就知道我们的动画文件拷贝到哪里去了。
那么这个压缩文件有什么要求吗?
我们拷贝一下出来,然后解压出来看看。

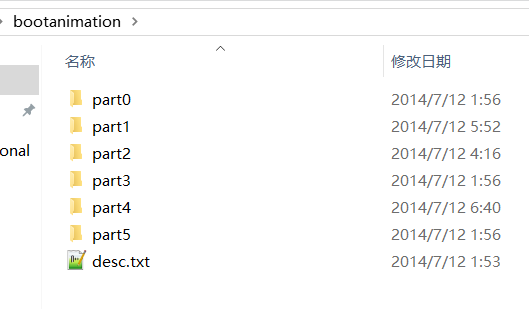
这个就是解压后的bootanimation.zip文件夹了,有6个文件夹和一个文本文件
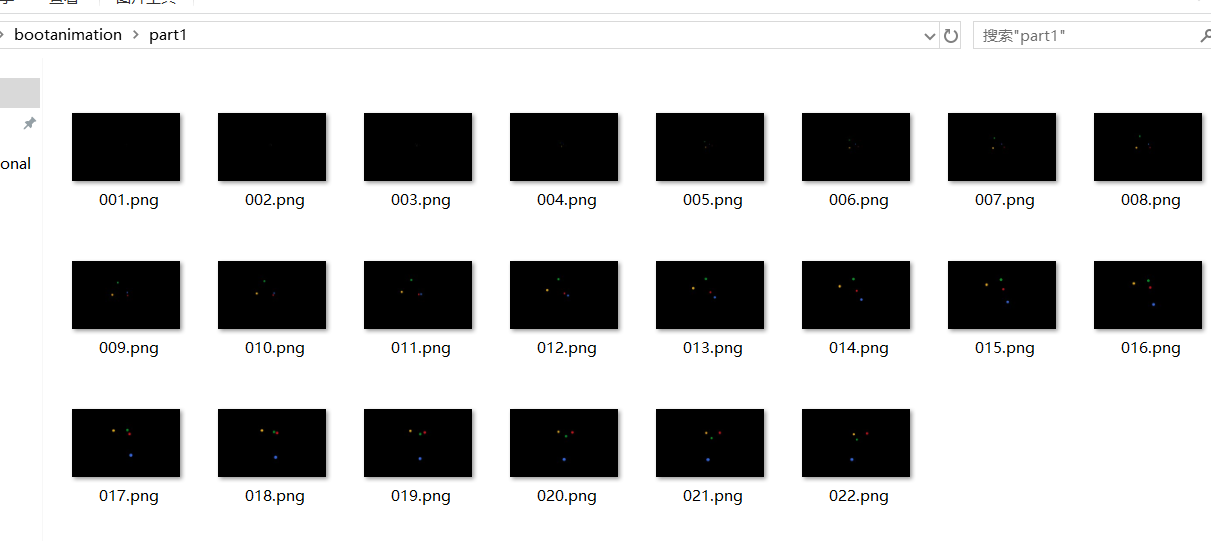
其实这6个文件夹里面是图片,而desc同学们应该猜到了,是描述文件。
而且文件夹里的图片是按顺序命名的

所以呀,同学们应该get到第一个知识点了,那就是动画的图片是按顺序命名的。
再来看看描述文件的内容:
640 400 30
c 1 30 part0
c 1 0 part1
c 0 0 part2
c 1 30 part3
c 1 0 part4
c 1 0 part5
- 640 400 30 这行一看就知道是分辨率了,后面这个30则是帧数,1秒钟切换多少张。
- 第二行开始第一个是的意思是:是否播完再进launcher,如是c,那么就播完再进入launcher,其他字符则不是,一般填写p。第二个参数是循环次数(count),如果是0那么表示的是一直循环,所以上面这些代码(把c改成p),只会在part2里循环播放的了(如果是c的话会把所有播放无的)。第三个参数是暂停时长(pause),是帧数为单位,比如说暂停30帧。第四个参数则是文件夹名称。
到此,应该就跟大家解释清楚了,也贴上代码给大家看看解析的代码:
主要代码
String8 desString;

if (!readFile("desc.txt", desString)) {
    return false;
}
char const* s = desString.string();

// Create and initialize an AudioPlayer if we have an audio_conf.txt file
String8 audioConf;
if (readFile("audio_conf.txt", audioConf)) {
    mAudioPlayer = new AudioPlayer;
    if (!mAudioPlayer->init(audioConf.string())) {
        ALOGE("mAudioPlayer.init failed");
        mAudioPlayer = NULL;
    }
}

Animation animation;

// Parse the description file
for (;;) {
    const char* endl = strstr(s, "\n");
    if (!endl) break;
    String8 line(s, endl - s);
    const char* l = line.string();
    int fps, width, height, count, pause;
    char path[ANIM_ENTRY_NAME_MAX];
    char color[7] = "000000"; // default to black if unspecified

    char pathType;
    if (sscanf(l, "%d %d %d", &width, &height, &fps) == 3) {
        // ALOGD("> w=%d, h=%d, fps=%d", width, height, fps);
        animation.width = width;
        animation.height = height;
        animation.fps = fps;
    }
    else if (sscanf(l, " %c %d %d %s #%6s", &pathType, &count, &pause, path, color) >= 4) {
        // ALOGD("> type=%c, count=%d, pause=%d, path=%s, color=%s", pathType, count, pause, path, color);
        Animation::Part part;
        part.playUntilComplete = pathType == 'c';
        part.count = count;
        part.pause = pause;
        part.path = path;
        part.audioFile = NULL;
        if (!parseColor(color, part.backgroundColor)) {
            ALOGE("> invalid color '#%s'", color);
            part.backgroundColor[0] = 0.0f;
            part.backgroundColor[1] = 0.0f;
            part.backgroundColor[2] = 0.0f;
        }
        animation.parts.add(part);
    }

    s = ++endl;
}
一看代码,大家都知道了每个内容的含义了吧。
知道了动画拷贝到哪里,知道了动画的图片命名,知道了描述文件的规则。
有了这些,同学们就可以自己去制作动画了。
最后也同样重要的,就是打包文件的时候,压缩方式是存储,而不是压缩,不要真正压缩了。
还有就是,注意desc.txt文件,是utf8编码,不要搞成windows的编码了,否则解析不了的。
开机动画有了以后,我们就可以去做一下Launcher吧,当然,先是简单版的,后面我们单独出去做我们的Launcher。
Launcher
Launcher我们在AOSP里不打算做很复杂,但是我们会在单独的Launcher课程里尽量地模仿iPhone的Launcher.
在Launcher这部分,我们会和大家一起探讨:
- 什么是Launcher?
- 如何创建Launcher应用
- 获取应用列表
- 对应用进行卸载
- 监听用安装/卸载的广播,更新应用列表
- 打开应用
Launcher是什么?
Launcher发射台的意思是吧,跟我们windows的桌面差不多。大概是我们的应用交互入口,用户交互的主页面吧。
//TODO: